In part 3 of the series Upgrading my home vSphere 4 cluster to a vSphere5 cluster we upgraded my ESXi4 hosts to ESXi5 with the help of Update Manger. Now that we’re running ESXi 5 where able to upgrade the VMFS3 datastores to VMFS5.
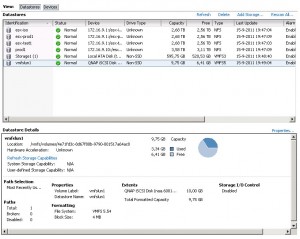
First a little overview. My server who is named ESX2 has 1 VMFS3.46 datastore named vmfslun1 with a block size of 4 MB. On this datastore I have 1 test VM called WinXP Mike. During the upgrade this VM is powered on. The LUN is hosted on a QNAP NAS with iSCSI.
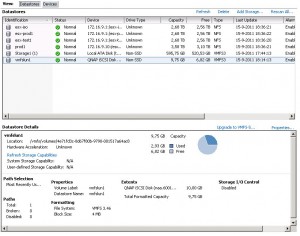
As you have probably heard as of vSphere5 the default and only block size you can select is 1MB. This is because of VMFS5 VMware isn’t using MBR anymore as the default partition table but GPT (GUID Partition Table). So when I upgrade my VMFS3 datastore to VMFS5 is MBR changed to GPT? No, as you probably know, the maximum size of a VMFS3 datastore is 2TB-512 Byte (without extends), the maximum size of a VMFS5 datastore is 64TB – 512 Bytes (without extends). This is a major improvement. So when does the MBR partition table change to GPT? Simple, when the VFMS5 datastore grows beyond 2 TB.
Be aware that upgrading your VMFS3 to VMFS5 is a one-way process, there is no turning back.The block size will not change, so if you have a VMFS3 datastore with a 4MB block size, after the upgrade you will have a VMFS5 datastore with a 8MB block size.
That said, you probably asking your self: “Does it matter that I have VMFS5 datastores with different block sizes?” This depends if you have a VAAI capable storage. This can influence the performance of your storage. Best is to have all the datastores the same block size. So a best practice is to create your VMFS datastores with a 1MB block size and move your VMs to them.
If recreating your VMFS datastores isn’t a option, you have to upgrade them.
- Select your ESXi host and click on the configuration tab.
- Select Storage and click on the LUN who holds a VMFS3 partition.
- In the Datastore Details section select Upgrade to VMFS5.

- vCenter will check is the datastore is ready to be upgrade. This means that all the host connected to the datastore have to be ESXi 5.

- The upgrade is perfomed by the ESXi host where you are connected to. Wait until the task is Completed in the resend tasks section.

- After a while your VMFS datastore is upgrade to VMFS5. This while my VM kept running. Nice!
More info on VMFS5? Look at the following blog post of Frank Denneman and Jason Boche.
It has been a while when I wrote part 2 but I’ve been really busy with vSphere5 that I didn’t had the time to complete my series. But now part 3 of upgrading my home vSphere 4 cluster to a vSphere 5 cluster. In this part where going to upgrade my 2 ESXi 4.1 server to ESXi 5 with Update Manager.
What I didn’t wrote about is that you have to upgrade your vSphere client. This is so straight forward that I’m not going to use a lot a screenshot for it. Just download the vSphere 5 client, start the installation, next, next, next and finish:).
Now we can begin to upgrade the first ESXi host. First step is to import the ESXi 5 ISO file into the repository of Update Manager.
- Start the Update Manger by clicking on the Update Manager icon in the vCenter Home view.
- In the Update Manager Administration view click on the ESXi Images tab.

- Click on Import ESXi Image.

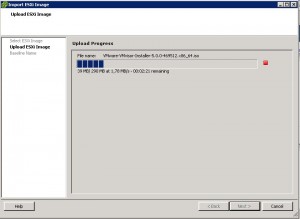
- Click on Browse and browser to your VMware-VMvisor-Installer-5.0.0-xxxxxx.x86_64.iso and click Open. You’re returned to the Select ESXi image screen. Click Next.

- Update Manger will try to connect to the Update Manager server and starts uploading the ISO file into the Update Manager repository. After the upload and import is finished click Next.
- Leave the option Create a baseline using the ESXi image selected and provide a name for the baseline, in my case I call this baseline upgrade_to_ESXi5. If you want you can provide a description for the baseline. Click Finish.
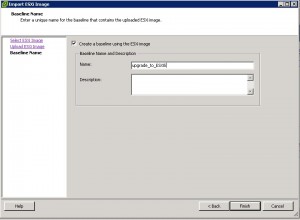
Now that the ESXi image is imported and we have created a baseline. We can begin to upgrade the first ESXi host.
- In vCenter home view, select Host and Clusters.
- Select you ESXi host and select the Update Manger tab.

- As you can see in my screenshot. It looks like my host is Compliant, but the new baseline is not attached. To attach the new baseline click on Attach.

- A new window will open and you’re able to select the new baseline. Select the upgrade_to_ESXi5 baseline and click Attach.

- Your Update Manager screen will refresh and the compliant state will show up as Unknown. Click on Scan.
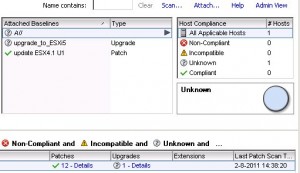
- In the Confirm Scan screen deselect Patches and Extensions and select Upgrades. Click on Scan.

- The scan will start and after a while your host compliance status will show up as Incompatible. My host shows up as Incompatible because I’ve installed custom NIC drivers. These drivers will be removed when the host is upgraded.
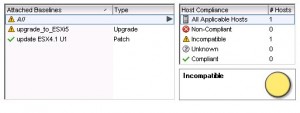
- Click on Remediate to start the upgrade process.
- In Baseline Groups and Types select Upgrade Baselines. When you selected Upgrade Baselines you’re able to select the baseline you’ve created. Click Next.

- Read the license agreement 😉 and place a mark before I accept the terms and license agreement. Click next.
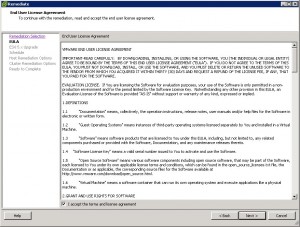
- As I have installed custom NIC drivers and I’m not sure those are compatible with ESXi 5 I place a mark before Remove installed third-party software that is incompatible with the upgrade, and continue with the remediation. Click next.

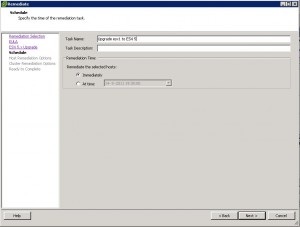
- In the schedule screen, you can give this upgrade a Task Name and a Task Description. If you want you can start this upgrade at a specific time, but I want to start the upgrade Immediately. Click next.
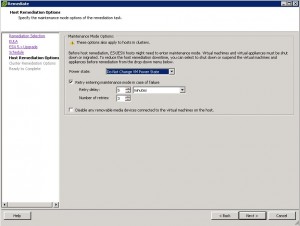
- Before the upgrade can start, the host has to be in maintenance mode. New with Update Manager 5 is that you can power off virtual machines before remediation. I don’t want that so I leave the default Do Not Change VM Power Sate selected. Click next.
- In the Cluster remediation option I only select Disable High Availabilility admission control if it is enabled for any of the selected clusters. The other option are not necessary for me. Click next.

- You’re provided with a summary of the selected options you’ve made. Review the option and if you’re sure you haven’t made a wrong choice, click finish and your upgrade will start.
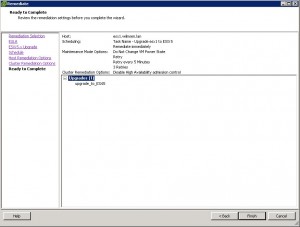
- You can keep track of the upgrade in the Resent Task screen. After a while you ESXi host will reboot and the upgrade is finised.


As you can see, my home ESXi is now version 5.0.0 build 469512.
There are many new cool features with vSphere5, who are well documenten by VMware in this pdf.
Next blog post will be upgrading the Virtual Machines.
After 5 year of blogging on blog.wilmsenit.nl it’s time to move another website name and URL.
As of now the primary URL of my blog will be www.virtual-hike.com. The content of my ‘old’ blog is still available through the old URL, but you will be redirected to the new URL. I also made some minor modification in the template layout. As you can see, I added the vExpert logo (who I’m proud off) and added a section for sponsors. The first sponsor I on board (thanks Toine for your support:-)).
In the passed I blogged about VMware and Linux, now my main focus will be VMware and virtualization. Hope you find the new layout nice.
Although I’m not the biggest fan of programming and there fore PowerCLI, with vSphere5 you cannot do without it. So, if you want to create a small PowerCLI script for daily tasks this reference card can come in handy.
Want to know more about PowerCLI? Follow @alanrenouf


