Upgrading my home vSphere 4 cluster to a vSphere5 cluster (Part 2)
In part 1 have have read how I upgraded my vCenter 4.1 server to vCenter 5.0. In this part I’m going to upgrade update manager on the same server. Later on I’m going to use update manger to upgrade my 2 vSphere ESXi 4.1 server to vSphere ESXi 5.
Again, the first step is to make a backup of you exciting server in case anything goes wrong. My vCenter server is a virtual machine, so I simply take a snapshot of it.
Now let us upgrade:
- Go to the vCenter5 DVD and start autorun.exe. Autorun starts a menu where you can choose the different installation option. Under VMware Product Installers select Update Manger and click on install.

- Select you language and the installer will start. You will get a messages that there is a earlier installation of Update Manager detected. Click Ok to start the upgrade to 5.0.

- Next through the welcome, End-User Patent Agreement and the license agreement. With the new version of Update Manager its no longer possible to patch the guest OS in your VM. With Update Manager 5 it’s only possible to upgrade a ESX/ESXi 4.x host to ESXi 5.0 only. So if you have old upgrade file on the host you can place a mark (default selected) in front of Delete the old host upgrade file from the repository. As we no longer can use them, we keep this option enabled. The second option is to start downloading patches immediately after the installation. I want to configure update manager first before downloading, so I disable the option: Download update from default sources immediately after installation.

- Next you will have to provide the password of the user who has administrator rights to your vCenter server. If you want you can alter the IP adress and HTTP port, but you probably won’t do this because the setting a correct.

- If needed alter the database information. In my case I used integrated Windows authentication so I didn’t have to change anything.

- Now we have to select if we want to upgraded the existing update manger database. Put a mark in front of YEs, I want to upgrade my Update Manager database an I have taken a backup of the existing Update Manager Database.

- Next are the TCP ports and who are used by update manager. If you want you can change these port, but the default are OK for me.

- Now we come to the final step of the upgrade. Click Install and you’re ready to go.

- During the installation you’re prompted that some files cannot be updated because there in use. After the installation you will have to reboot the server.

- During the installation I got a error: Error 25113: Setup Failed to generate JRE SSL Key
After some investigation I found a KB article who say’s that a wrong version of openssl existinst on the server who temporarily has be renamed. I forgot to take a screen shot of it (the one you see, I found on the internet) and wanted to reproduce the error. But when I did the installation again, I didn’t get the error and the installation went fine. I did had to change the SSL port and web port because those were in use. So I think that did the trick.

Final step in the upgrade is to install the plugin in your vSphere client. Without this plugin your not able to use Update Manager.
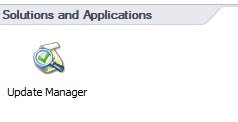
In your vSphere client go to Plug-ins and Manage Plugins. Under Available Plug-ins click on Download and Install behind VMware vSphere Update Manager. Enter through the installation keeping the defaults (this is no rocket science;-)). - After the installation of the plug-in you’ve got a extra icon in the Home view under Solutions and Applications.

Click on the Update Manger Icon and w new View will open. There we can configure the update manager, create baselines, upload patches etc. The options we’re going to use when we upgrade the ESXi hosts. But this is for part 3.
About Michael
Michael Wilmsen is a experienced VMware Architect with more than 20 years in the IT industry. Main focus is VMware vSphere, Horizon View and Hyper Converged with a deep interest into performance and architecture.
Michael is VCDX 210 certified, has been rewarded with the vExpert title from 2011, Nutanix Tech Champion and a Nutanix Platform Professional.
