Upgrading my home vSphere 4 cluster to a vSphere5 cluster (Part 3)
It has been a while when I wrote part 2 but I’ve been really busy with vSphere5 that I didn’t had the time to complete my series. But now part 3 of upgrading my home vSphere 4 cluster to a vSphere 5 cluster. In this part where going to upgrade my 2 ESXi 4.1 server to ESXi 5 with Update Manager.
What I didn’t wrote about is that you have to upgrade your vSphere client. This is so straight forward that I’m not going to use a lot a screenshot for it. Just download the vSphere 5 client, start the installation, next, next, next and finish:).
Now we can begin to upgrade the first ESXi host. First step is to import the ESXi 5 ISO file into the repository of Update Manager.
- Start the Update Manger by clicking on the Update Manager icon in the vCenter Home view.
- In the Update Manager Administration view click on the ESXi Images tab.

- Click on Import ESXi Image.

- Click on Browse and browser to your VMware-VMvisor-Installer-5.0.0-xxxxxx.x86_64.iso and click Open. You’re returned to the Select ESXi image screen. Click Next.

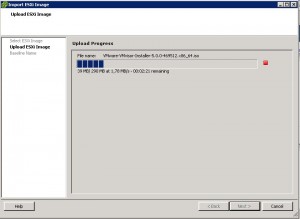
- Update Manger will try to connect to the Update Manager server and starts uploading the ISO file into the Update Manager repository. After the upload and import is finished click Next.
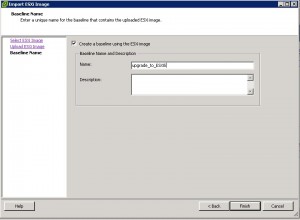
- Leave the option Create a baseline using the ESXi image selected and provide a name for the baseline, in my case I call this baseline upgrade_to_ESXi5. If you want you can provide a description for the baseline. Click Finish.
Now that the ESXi image is imported and we have created a baseline. We can begin to upgrade the first ESXi host.
- In vCenter home view, select Host and Clusters.
- Select you ESXi host and select the Update Manger tab.

- As you can see in my screenshot. It looks like my host is Compliant, but the new baseline is not attached. To attach the new baseline click on Attach.

- A new window will open and you’re able to select the new baseline. Select the upgrade_to_ESXi5 baseline and click Attach.

- Your Update Manager screen will refresh and the compliant state will show up as Unknown. Click on Scan.
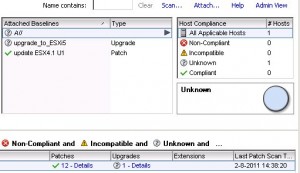
- In the Confirm Scan screen deselect Patches and Extensions and select Upgrades. Click on Scan.

- The scan will start and after a while your host compliance status will show up as Incompatible. My host shows up as Incompatible because I’ve installed custom NIC drivers. These drivers will be removed when the host is upgraded.
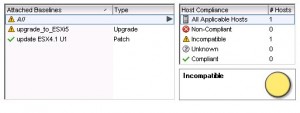
- Click on Remediate to start the upgrade process.
- In Baseline Groups and Types select Upgrade Baselines. When you selected Upgrade Baselines you’re able to select the baseline you’ve created. Click Next.

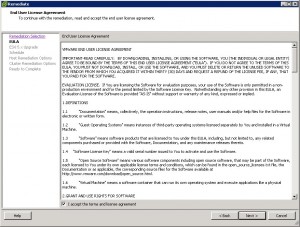
- Read the license agreement 😉 and place a mark before I accept the terms and license agreement. Click next.
- As I have installed custom NIC drivers and I’m not sure those are compatible with ESXi 5 I place a mark before Remove installed third-party software that is incompatible with the upgrade, and continue with the remediation. Click next.

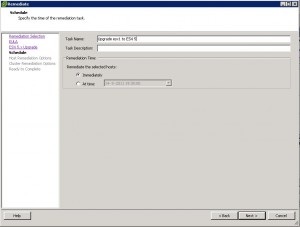
- In the schedule screen, you can give this upgrade a Task Name and a Task Description. If you want you can start this upgrade at a specific time, but I want to start the upgrade Immediately. Click next.
- Before the upgrade can start, the host has to be in maintenance mode. New with Update Manager 5 is that you can power off virtual machines before remediation. I don’t want that so I leave the default Do Not Change VM Power Sate selected. Click next.
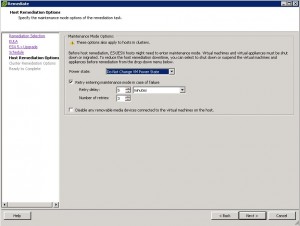
- In the Cluster remediation option I only select Disable High Availabilility admission control if it is enabled for any of the selected clusters. The other option are not necessary for me. Click next.

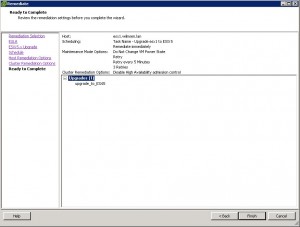
- You’re provided with a summary of the selected options you’ve made. Review the option and if you’re sure you haven’t made a wrong choice, click finish and your upgrade will start.
- You can keep track of the upgrade in the Resent Task screen. After a while you ESXi host will reboot and the upgrade is finised.


As you can see, my home ESXi is now version 5.0.0 build 469512.
There are many new cool features with vSphere5, who are well documenten by VMware in this pdf.
Next blog post will be upgrading the Virtual Machines.
About Michael
Michael Wilmsen is a experienced VMware Architect with more than 20 years in the IT industry. Main focus is VMware vSphere, Horizon View and Hyper Converged with a deep interest into performance and architecture.
Michael is VCDX 210 certified, has been rewarded with the vExpert title from 2011, Nutanix Tech Champion and a Nutanix Platform Professional.
